Completely Bespoke Design

Completely Bespoke Design

All our staircases are designed and fitted to your custom specifications making every staircase we install as unique as you are.

25+ Years Experience

25+ Years Experience

Established in 1996, we’ve spent over 25 years honing our skills, perfecting our craft and sharing our know-how with the Abbott-Wade Family.

Supply, Design & Install

Design, Manufacture & Install

Our detailed design & survey process allows us to custom-manufacture our own staircases using the latest CNC technology in our workshop where they are built and pre-finished ready for us to install in your home.

“Excellent” Reviews

Nationwide Service

Our expert team of designers & installers are ready to visit you throughout England, Scotland & Wales.

“Excellent” Reviews

“Excellent” Reviews

Our Customer Feedback Page speaks for itself. We’ve spent over 25 years building the best reputation in the business.

How is a staircase renovation performed?

A good first tip is to clean and polish the existing structure thoroughly then step back and study it in detail, looking for any warping, cracking or issues with stability that could be fixed without having to undertake a complete overhaul. However, if you want a total change, this may not be necessary.

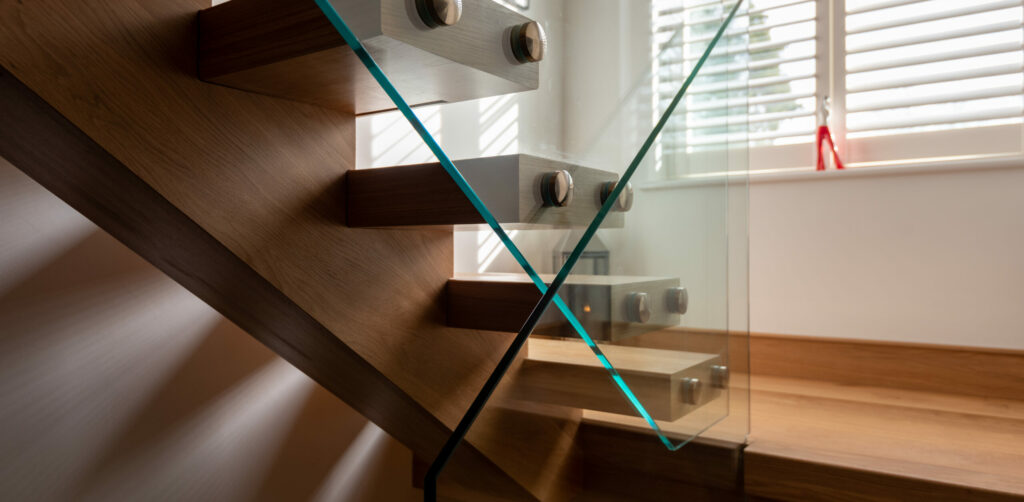
The next step in your approach to a staircase renovation should be to take stock of your existing set-up – listing what you like about it, what works and what doesn’t work both cosmetically and structurally – and then write up a selection of features you would like your new design to incorporate. Start big first; note down your dream ideas, no matter how ambitious, and collect them together in a scrapbook or on a Pinterest board. “Thinking outside the box” may just reveal a few approaches you hadn’t considered, and it may turn out that you’re able to achieve more than you first realised.

Another top tip is to engage as many people in your plans as possible. It’s important to ask friends, family and the experienced joiners or fitters you’re working with for their advice and input – both practical and design-based. Problem-solving and ideas generation is always easier when there are many minds at work.

Remember that you can only work within the existing space – for example, unless you’re planning to completely gut your house, your hallway and landing are likely to remain in the same place!

Take totally precise (down to half a millimetre!) measurements of every aspect of your existing staircase to ensure your new staircase design ideas will fit perfectly.

Staircase Renovation Guide

At this point, before you continue any further, it’s extremely important to read up on the rules, regulations and legal issues inherent in staircase design. A few basic tips include the following:

  • If your staircase is less than a metre wide, it is illegal to neglect to fit a handrail on at least one side. If it’s wider than one metre, you need handrails on both sides.
  • The “rise” and “going” of your steps need to adhere to certain measurements. The maximum legal rise (the vertical part of a step) is 220mm, and the minimum going (the horizontal part) is also 220mm.
  • Handrails can be no lower than 900mm above the nosing of the stairs (the points where the risers and treads meet), to prevent falls. This applies to rails on both staircases and landings.
  • To prevent anything or anyone getting trapped or stuck, you need to be able to pass a 10mm spherical object through any gaps in the balustrading of a staircase (the balustrading is the portion of the staircase attached to the handrail that also includes the baserail below it, the newel posts at the ends or the corners and the infill – which might be made up of glass or spindles.)
  • A staircase’s pitch cannot be steeper than 42 degrees (the pitch is the angle of ascent and descent. You can judge this by connecting the nosings together with a line – known as a “pitch line” and measuring the angle between this line and the floor).
  • The headroom of a staircase must always be at least 2 metres above the pitch line, allowing people of any height to climb up and down the stairs safely.

Staircase renovation design ideas

If you like what you have seen of staircase renovations but you’ve no idea where to begin, here are a few suggestions to help you on your way.

  • Keep the look up-to-date, but be aware of how quickly certain design aspects “age”. If you want something “edgy”, think about how you might be able to upgrade it as fashions change. A good idea is to keep any bold decisions cosmetic – paint and certain finishes can be stripped back or covered, while “brave” structural choices can be difficult and expensive to overhaul.
  • Choose durable, long-lasting material. Most joinery companies have strong preferences about the materials they work with, and there’s often a good reason for that. Discuss materials with the company and try to opt for high-quality. Remember, if you buy cheap, you buy twice.
  • Go simple. A natural wood finish never goes out of fashion, is easy to clean and doesn’t show dirt or chip easily. Metal and glass are also excellent choices.
  • Are you likely to update your furniture and other fittings? Be sure that your staircase design complements the look and feel of the rest of the house and its design.

Staircase Renovation: before and after

Before you take the plunge and begin designing your brand new staircase, it’s worth considering the costs involved.

Of course, the total you’ll be spending depends entirely on the amount of work that needs doing and the types of materials to be used, more major work obviously tending to be more expensive than minor renovations.

If you wish to totally replace your staircase, depending on the size and complexity of the flight as well as the original state it is will determine the amount you pay.

Abbott-Wade Staircase Renovation

Staircase renovation design ideas

If you like what you have seen of staircase renovations but you’ve no idea where to begin, here are a few suggestions to help you on your way.

  • Keep the look up-to-date, but be aware of how quickly certain design aspects “age”. If you want something “edgy”, think about how you might be able to upgrade it as fashions change. A good idea is to keep any bold decisions cosmetic – paint and certain finishes can be stripped back or covered, while “brave” structural choices can be difficult and expensive to overhaul.
  • Choose durable, long-lasting material. Most joinery companies have strong preferences about the materials they work with, and there’s often a good reason for that. Discuss materials with the company and try to opt for high-quality. Remember, if you buy cheap, you buy twice.
  • Go simple. A natural wood finish never goes out of fashion, is easy to clean and doesn’t show dirt or chip easily. Metal and glass are also excellent choices.
  • Are you likely to update your furniture and other fittings? Be sure that your staircase design complements the look and feel of the rest of the house and its design.

Staircase Renovation: before and after

Before you take the plunge and begin designing your brand new staircase, it’s worth considering the costs involved.

Of course, the total you’ll be spending depends entirely on the amount of work that needs doing and the types of materials to be used, more major work obviously tending to be more expensive than minor renovations.

If you wish to totally replace your staircase, depending on the size and complexity of the flight as well as the original state it is will determine the amount you pay.

The Team

How to fit a staircase

Now that you’ve made all necessary preparations and have a strong idea and clear plan of action, it’s time to get started. So what is the process involved in fitting a whole new staircase?

While it is recommended that you hire a specialist company to undertake the fitting of your staircase, but if you are experienced and highly skilled in DIY, there is no real reason why you cannot attempt it yourself. Remember, always work from top to bottom when fitting a new staircase.

  1. The first step is to double check that all measurements are correct as per your drawn up plans. It is vital that you re-measure the well size (the gap or hole through which the stairs will travel), the overall planned width of the staircase, and the floor to floor dimension (this is the total vertical height of the staircase. This measurement helps you to calculate the number of treads and risers, their height and the pitch of the staircase overall.)
  2. Next, you need to prepare your top newel. Remember, you are not fitting it in place at this stage. It simply needs to be cut in a way that will allow it to fit perfectly on top of the trimmer joist (the trimmer joist supports the area of the stairwell opening at the top).
  3. You can now place the first riser temporarily, marking a line to show how deep it will cut into the newel. You can now carefully cut out this recess.
  4. After this, you can prepare your bottom newel in a similar way to the top one, cutting it to the correct length but not installing it. Remember, the two newels can be different lengths if the floor is slightly uneven.
  5. You can now glue the bottom newel in place onto the string (the string is a plank or narrow sheet that runs up the angle of the stairs below either side of the treads and risers.) Once glued in, the newel can be dowelled in place for extra security.
  6. The bottom riser can now be fitted. Slot it into position and mark it in line with the bottom of the newel. Remove it and cut it to the correct length so it can be screwed and glued into place. You should also use a wedge to secure it on the string side.
  7. Once you’ve fixed the bottom riser into place, affix three or four glue blocks per tread onto the underside of the staircase. Glue blocks are triangular wooden blocks that maintain the stability of the treads and risers and strengthen the string. They also help to prevent creaking.
  8. The top newel can now be glued and dowelled into the string.
  9. Now fit the handrail to the top and bottom newel using more dowels and plenty of glue.
  10. You can now fit the top riser in place using screws and glue, and then install the top nosing in the same fashion.
  11. Once you are happy with the whole setup, it’s time to fix the rest of the stairs into place. You need to ensure they are secured to the trimmer and through the string on each side at several points. Before you attach them use a spirit level to check that the treads and risers are level.
  12. You can also now attach the top newel to the trimmer permanently using glue and screws.
  13. Now it’s time to fit the base rail to the top of the string, again using glue and screws.
  14. This is the point where you can fit the apron, along with its nosing and covermould. The apron is the facade covering the space between the ceiling on the lower level and the floor on the upper level of the staircase. The covermould is a detail that strengthens and disguises the joint between the apron and the downstairs ceiling.
  15. Now the spindles or infill pieces can be carefully glued into place.
  16. Finally, add details, such as newel caps, which should be carefully glued into place.
The Team

Make An Enquiry

Are you intrested in finding out more? Leave your
details below to speak to an expert.

    Accept GDPR policy to send email (required)*
    New Staircase & Bespoke Replacement Staircases UK
    01744 634 442